Bhattacharya Lab Gel Electrophoresis Protocol
Below based on Putnam Lab Protocol written by M. Schedl.
Goal:
A gel matrix that contains an electrical field used to separate DNA strands based on size. The bigger strands move through the gel slower and tend to stay closer to the wells compared to the small strands that will move faster and end up closer to the end of the gel. Fluorescent dyes are used to visualize the position of the nucleotides on the gel relative to a standard, called a ladder). The position of the DNA band on the gel relative to the ladder allows you to estimate the size of the DNA fragment.

Materials:
- Agarose
- 1x TAE buffer
- Kimwipes
- Microwave
- GelGreen, 10000x in water (is a non-toxic alternative to ethidium bromide)
- 6x loading dye, such as Promega Blue/Orange Dye or New England Biolabs’ Purple Dye
- Gel electrophoresis power supply
- Gel tank (see image above)
- 1k ladder, such as GoldBio 1 kb PLUS™ DNA Ladder
- DNA
- Gel Imager
- Computer with GeneSnap software installed
Note: GelGreen must be stored in the dark. I have it stored (along with a weighboat and lab spatula) in the small drawer on the far right of the gel bench.
Protocol:
Part 1. Making the gel
- Making gels:
For a 1% gel:- Small box (75 mL): 75mL new 1X TAE buffer and .75g agarose
- Medium box (100mL): 100mL new 1X TAE buffer and 1g agarose
For a 1.5% gel: - Small box (75 mL): 75mL new 1X TAE buffer and 1.12g agarose
- Medium box (100 mL): 100mL new 1X TAE buffer and 1.5g agarose
- Use a weigh boat to measure agarose and using the Erlenmeyer flask from the gel bench to measure the TAE.
- Mix in an Erlenmeyer flask, add the agarose by taco-ing the weigh boat and carefully pouring the powder as to not get it stuck to the side of the flask. Pour up to your desired volume with new 1X TAE.
- Put a scrunched Kimwipe in the mouth of the flask and put in the microwave for 1 minute. Every 20 seconds open microwave and swirl flask. Use glove because glass gets hot and don’t be afraid to check too often because it can boil over. Microwaving time can vary, so keep adding time until when you look at the liquid when swirling it is completely clear and there are no “flakes”.
- Add 5μl GelRed or 1μl GelGreen to the liquid and swirl the flask to mix thoroughly.
- Set up gel tank, place small tray in the gel box sideways and make sure there is an air-tight seal with the rubber noodles.
- Let gel cool up to 5 minutes in the flask before pouring into the gel tray, if you can safely hold it, that’s a good sign it’s ready.
- Put desired comb size into the tray.
- Using a pipette tip, move any bubbles to the side of the tray.
- Let harden until opaque and cool ~30min.
Part 2: Running the gel
- Take out and orient the hardened gel with the comb side to the top of the box. Take the comb out of the hardened gel.
- Pour enough “used” TAE buffer into the gel box to cover the gel with a thin layer of liquid and make sure there are no dimples where the wells are.
- In a new strip tube, make 5μl aliquots of your DNA samples. Add 1μl of loading dye to each sample and vortex and spin down to mix.
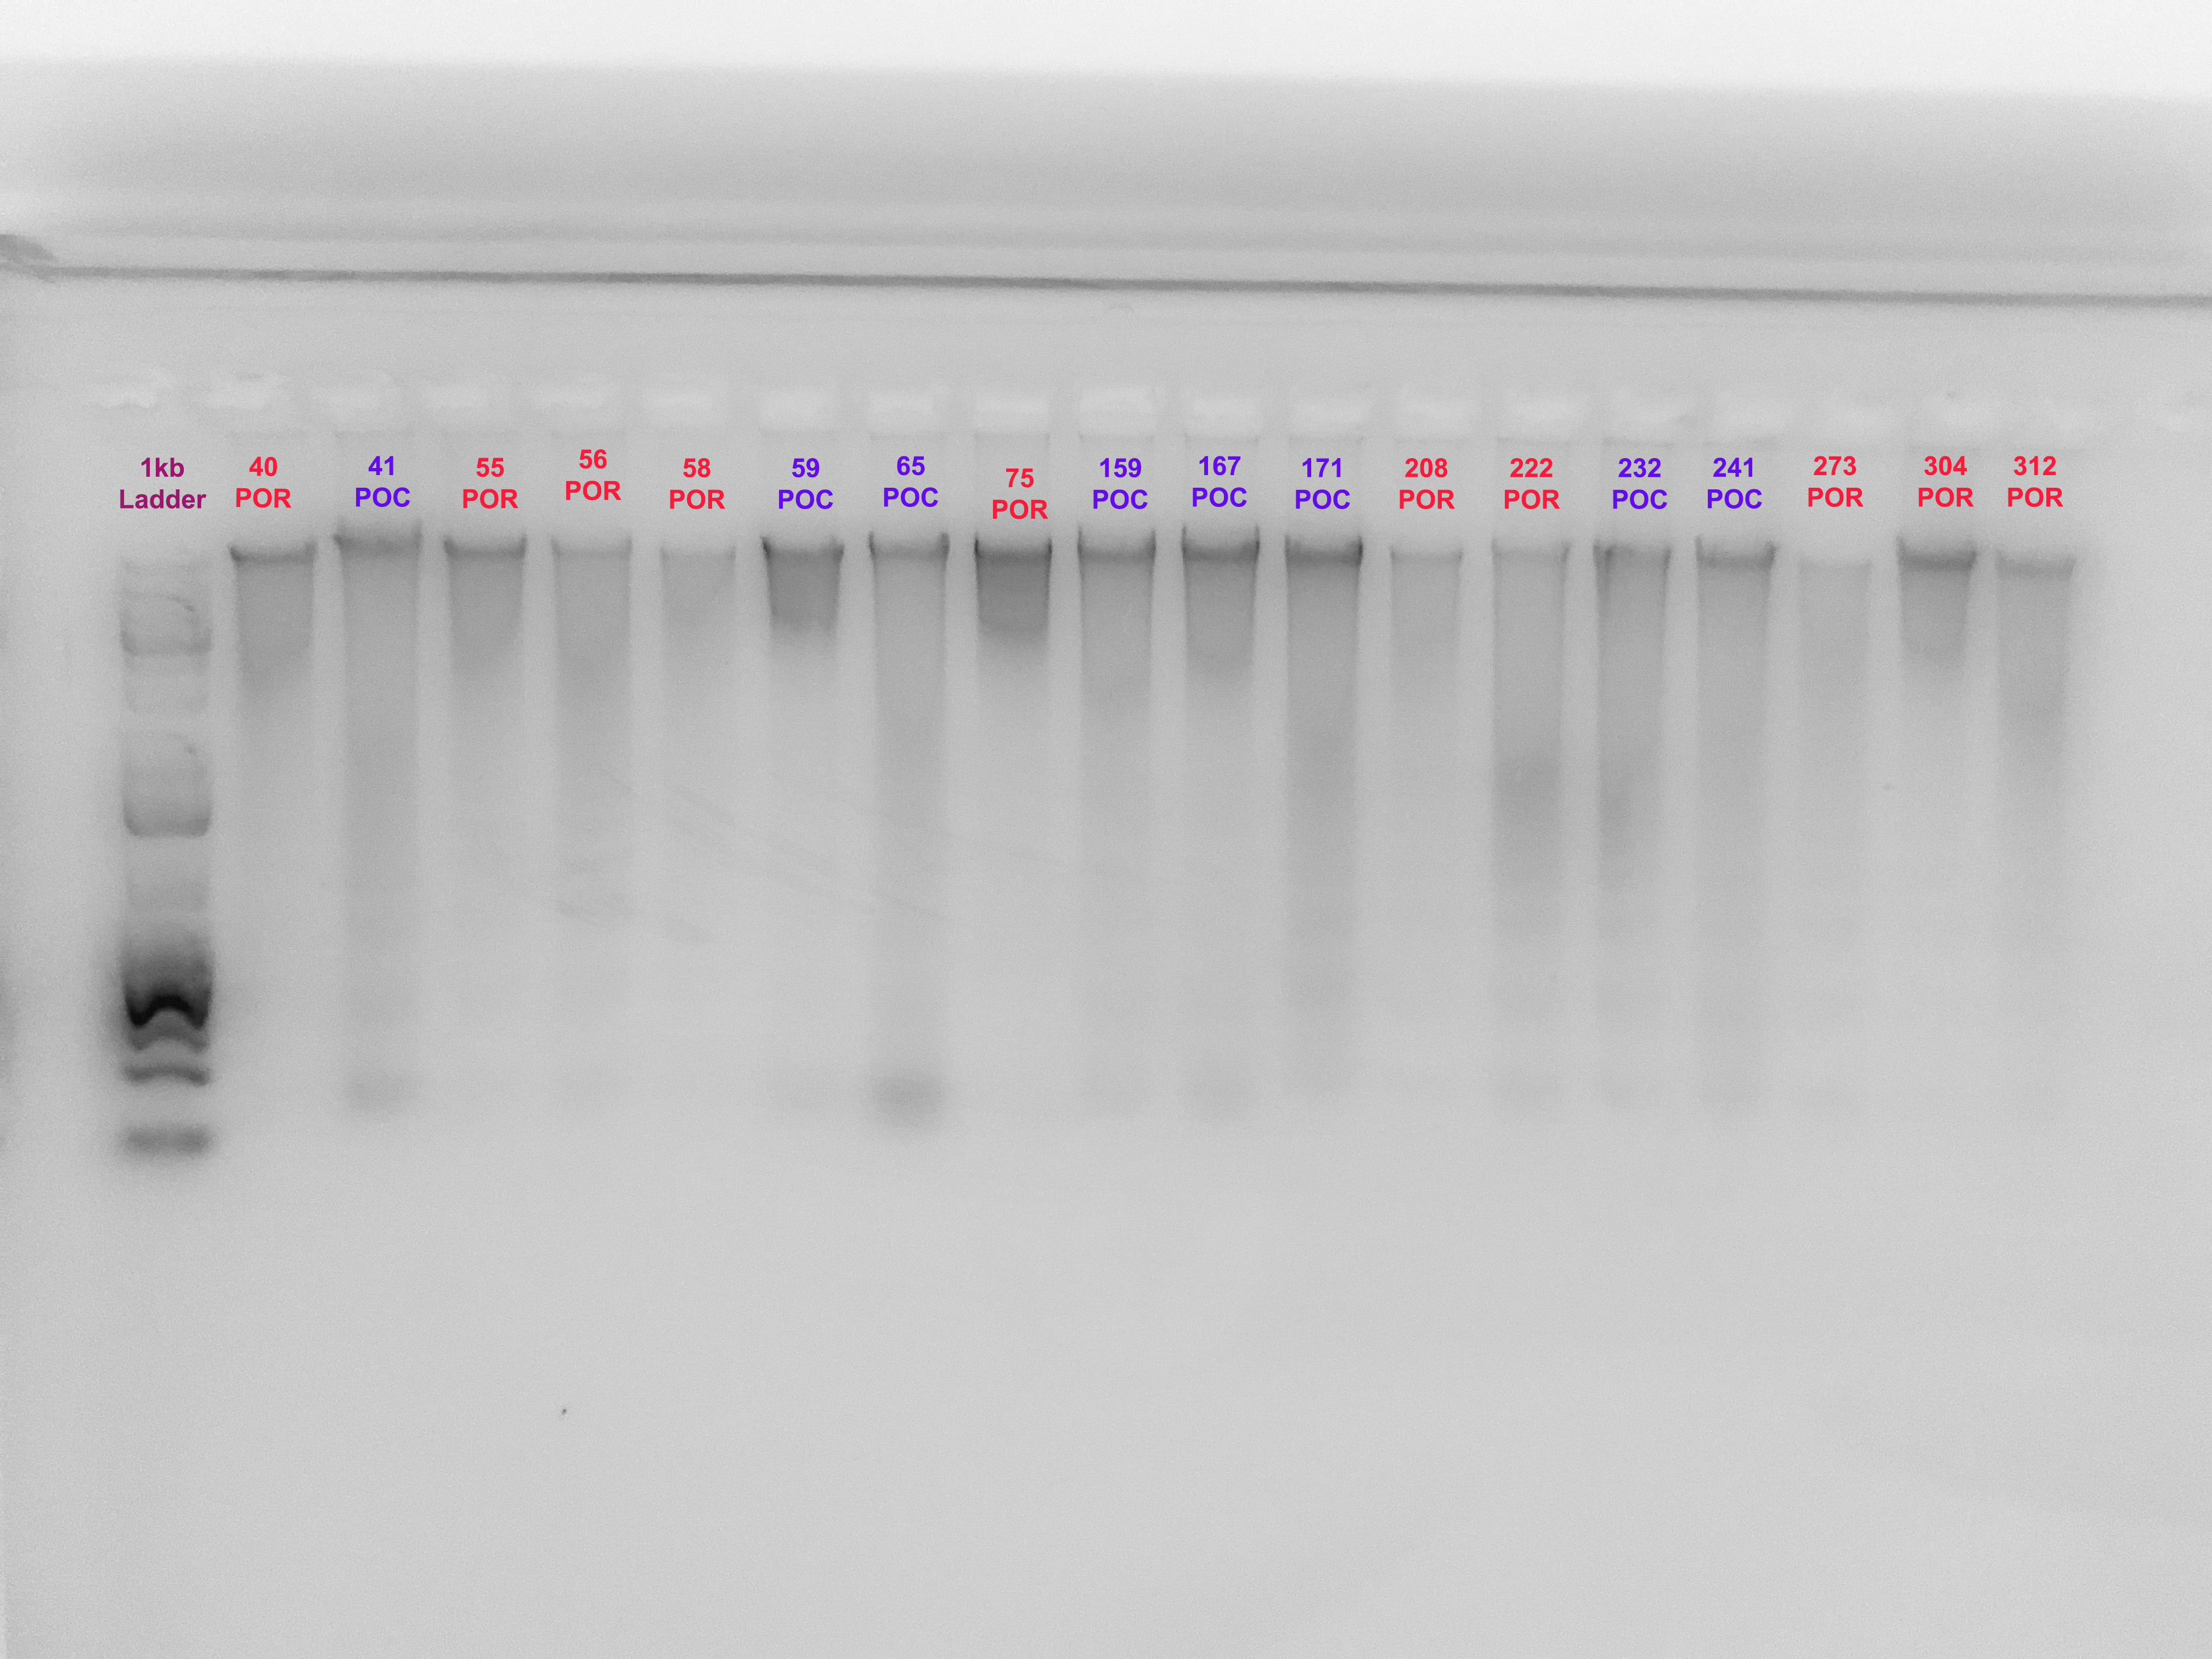
- Add 3-4μl of the appropriate ladder to the first well in the gel. Note: Do this for each row in your gel.
- Add your samples to each well: ~6μl. Make sure you have made a map in your notebook that shows the order of samples.
- Make sure gel is set up to “run towards red” – the black (-) (top of the rig next to the wells) and red (+) (bottom of the rig near the end of the gel) cords of the gel rig..
- Plug black cable into black insert and red cable into red insert of the gel box.
- Turn box on and make sure voltage is set to 100V. Set time for 30-60min. You should see bubbles forming in the TAE buffer, almost like it’s simmering.
Part 3: Imaging the gel
- Once the gel is done running, turn on the computer on the bench opposite the gel bench. Log in with the login information taped to the computer. Open the GeneSnap app.
- Go over to the imaging booth (big grey box to the right of the computer). Switch it on and turn on its “White light”. Open the door to the booth.
- Back at the gel bench, take the tray out of the boxy and using a Kimwipe, carefully slide the gel into your hands. Bring over to the imaging booth and set in the center of the black square. Make sure there are no air bubbles trapped underneath.
- Use the camera image on GeneSnap to position the gel under the camera at the top of the imaging booth.
- One the gel is placed, close the door to the imaging booth, swtich off the shite light and turn on the UV light.
- At the computer, make sure that the UV wavelength is set at 254 nm.
- To image the gel, press the green button at the top-left of the page. It will take a few moments. You may need to increase the exposure time if the band is light.
- Alter the image, as desired and save. If this is your first time using the imager, you can make a folder with your name on the desktop and save it there. I recommend using the filename
project/yyyymmdd-lastname-firstname-samples.pdf
Part 4: Cleanup
- Slide the gel off the imagerwhen you are done and place it in the large plastic jar in the SAA for gel waste.
- Pour the leftover TAE from the gel box into the used TAE container using a funnel.
- Rinse the gel box, comb, and flask in DI type II water.
- Wipe the imager with a Kimwipe and DI type II water.
Recommended Parameters for a typical small gel (18 samples, 2 ladders)
Note: These parameters will vary depending on the length of the gel tank and the weight of the target fragment). See Thermo Fischer’s Nucleic Acid Electrophoresis Workflow for further reference.
- 75 μl TAE buffer + 0.75 g agarose + 1 μl of Biotium gel GREEN gel stain to make a 1% agarose gel
- 5 μl samples + 1 μl 6x Promega Blue/Orange loading dye
- 5 μl GoldBio 1 kb PLUS™ DNA Ladder for each row of wells
- Run at 120V for 1 hour