
How to Run the Bhattacharya Lab PCR Machine (Thermocycler)
The Bhattacharya Lab houses an Eppendorf Mastercycler (catalog number 5333). The manual can be found online (here). The instructions here provide abridged instructions for running the machine. Please refer to the manual for more detailed instructions.
Erin Chille’s Quick Start Guide:
Turning on the PCR machine
- To turn on the PCR machine, flip the switch in the back left corner.
Programming the PCR Machine
- Turn on the machine.
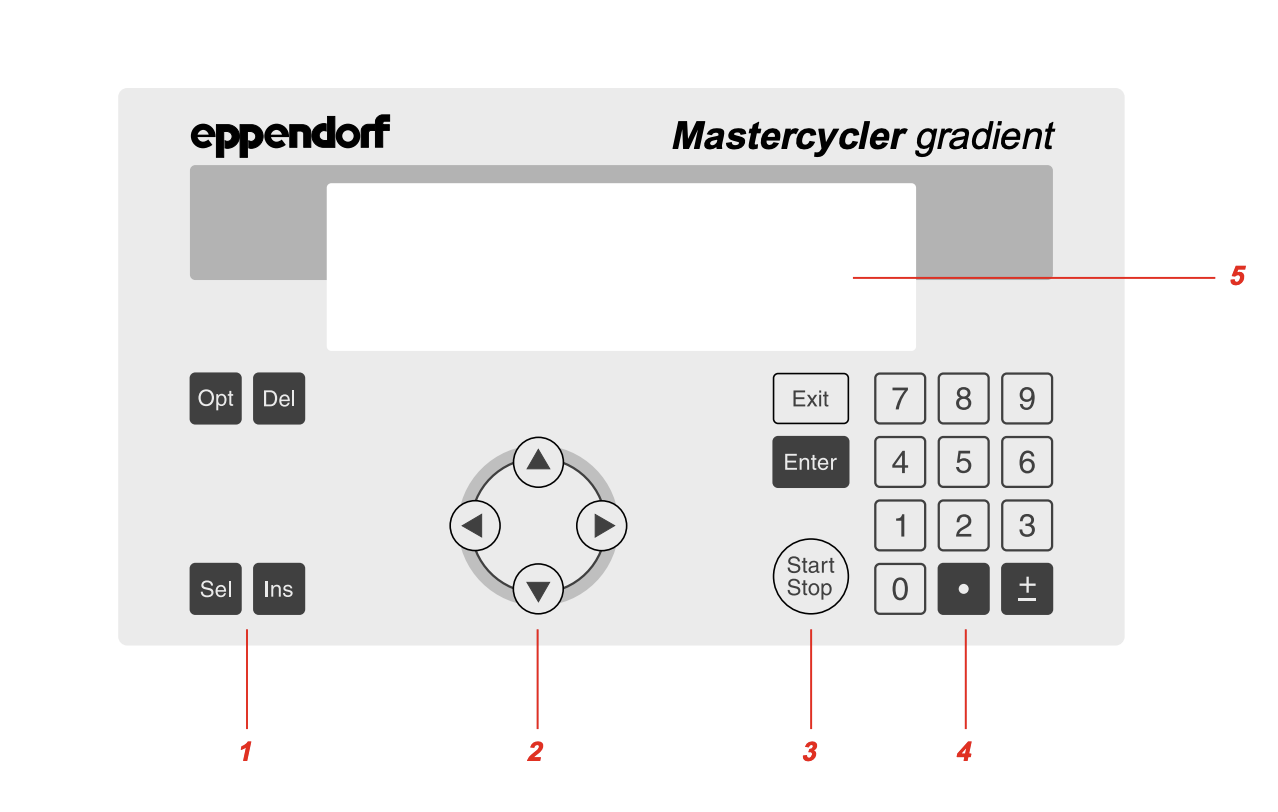
- Use the down button on the front console to highligh “Files…”. Press the “Enter” button on the right of the console to navigate to “Files…”.
- Use the down button to highlight “New”. Press “Enter”. A window should be open on the screen the says “Control: Block” and “Nowait: auto”.
- Use the arrows to Highlight “Block”. Press “Sel” to change to “Tube”. This is mode montiors the temperature of the tubes (as opposed to the block) and allows temperature-control of samples in various different tubes with various different filling volumes.
- Use the down button to navigate down to “end”. Press “Sel” to make your first line of code. It should look like: “Temp: xx°C Time: hh:mm:ss”. Use the number pad on the right of the console to enter your time and temperature.
- Repeat step 5 until you reach the end of your cycling steps.
- To cycle through your previous steps, use the down button to navigate down to “end”. Press “4” on the number pad. It should now say: “GOTO: x REP: x”. Enter the line number corresponding to which step you would like your cycling to start with, and how many times you would like your cycle to repeat. The machine will repeat each step in order starting with the step you specify until it reaches the specified number of reps.
- Use the down button to navigate down to “end”. Press “Sel” to make a line of code.
- To hold the thermocycler at a specific temperature until you abort the program, use the down button to navigate down to “end”, then press “2”. It should now say: “HOLD: x°C”. Use the number pad on the right of the console to enter your holding temperature.
- To complete your program, use the down button to navigate down to “end”. One the right of the consold, select “Exit”. It will now ask you if you want to save the program. Press “Enter” to save. You can now name your program.
- To name your program, use the “Sel” button to scroll through the internet. Use the arrows to move to the next character. Names can be a combination of letters and numbers. Once you are satisfied with your name, press “Exit”.
- Hooray!! You can now use your program :-)
Example program
Here is an example of a program I use to amplify the 16S region in extracted DNA from coral tissue samples:
| Line | Step | Temp | Time |
|---|---|---|---|
| 1 | Initial denaturation | 94°C | 00:03:00 |
| 2 | Denaturation | 94°C | 00:00:45 |
| 3 | Annealing | 52°C | 00:01:00 |
| 4 | Extension | 72°C | 00:01:30 |
| 5 | Cycle | GOTO 2 REP 35 | |
| 6 | Final extension | 72°C | 00:10:00 |
| 7 | Hold | HOLD 4°C |
Running a program
- Turn on the machine.
- Use the down button on the front console to highligh “Run”. Press the “Enter” button on the right of the console to navigate to “Run”.
- Use the down button to highlight the desired program. Press “Enter” to select the program. Alternatively, if the name of the program is already displayed at the bottom of the menu, you can press the “Start/Stop” button on the righ tof the console.
- The machine should ask about the type of tube you are using and how much fluid is in them. Use the number pad and the “Enter” button to input these values. The program should begin running.
- To check the run time, press “Opt” on the left of the console. It will display for 5 seconds before returning to the default screen.
- Huzzah! Your program is now running! All there’s left to do now is wait.
Written on June 9, 2022